Tuesday 29 May 2012

Johor Circuit at Pasir Gudang 28 May 2012

We were supposed to meet at 7.30am at my place but as usual, everyone was late haha. So I went to buy 2 cans of red bull and drank them all before Yi Yang arrived. Then came Eric, Edwin and then Rafie. A little adjustments on our bikes and gear before we set off to Woodlands checkpoint. Traffic was relatively smooth and we took the new highway route, a little hard to explain the route but it seems like most Singaporeans are already using it. Google maps hasn't updated their map yet, I will post the route once the map is updated.

It was about 8.45am and we stopped at the McDonald's just outside Johor Circuit for a quick breakfast. It was about 9.15am when we reached the gate of the circuit and got our visitor passes. There is no need to display this pass, just remember to return it to the person at the gate before you leave.

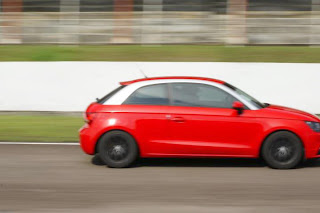
We hurried to the pits and quickly went to to the administration office just beside the pits to pay for our sessions. Eric went first because the car session is at 9.30am! Each of us took about 3 rounds sitting as passenger in his car. Quite an exhilarating experience and I took it as an opportunity to learn the track. Rule of thumb quoting Edwin, if you can't see where the track is leading to, prepare for a right turn. For a pretty much stock Audi A1, Eric mustered a respectable timing of around 2m 20s. Not bad for a first timer.

Here are some shots of his car.

Audi A1 at Johor Circuit's front straight

Audi A1 before crossing the finishing line

Audi A1 past the finishing line

Audi A1 brakes overheated and melted the brake caliper's paint

The last photo shows one of his front brake calipers, the paint was bubbling when he came back into the pits.  Apparently, the high temperature paint was not high temperature enough to take track abuse.

Next up was the bikes session. There was a huge bike crowd because a racing team was there to practise, the crowd tagged along to practise with the pros. Before we started, the racing team's manager came over to brief us on track safety rules. This is especially helpful for any first timer, we are all at the track for fun and bikes are expensive. So follow these simple guidelines.

1. Fold in your mirrors if you can, if not, don't check back for fear that you are obstructing anyone, experienced riders will overtake you safely, so do not be worried, just follow your own line and ride.

2. Before entering the pits, raise your left hand or left leg, so riders behind you know that you are entering the pits and will not overtake you on that side.

3.  Ride within your limits. The track is for everyone to have fun. Don't perform any dangerous acts that might endanger others.

That's about it, simple guidelines that everyone should follow. Before I forget, I set my cold tyre (Pirelli Diablo Supercorsas) pressures at 29psi front and 26psi rear. Now for some photos!

The bikes before heading out

Honda CBR600RR moving off

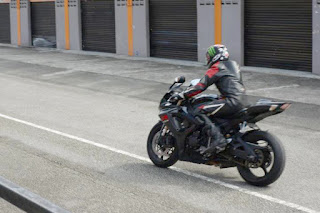
Suzuki GSX-R600 on the way out

Yamaha R6 on the front straight

Yamaha R6 on the front straight

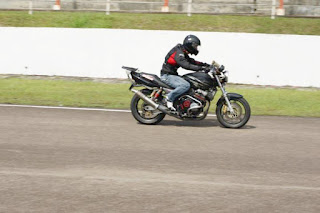
Honda CB400 Spec 1 on the front straight

Honda CB400 Spec 1 on the front straight

Suzuki GSX-R600 on the front straight

Suzuki GSX-R600 on the front straight

Honda CBR600RR on the front straight

Honda CBR600RR on the front straight

Rafie back for a breather

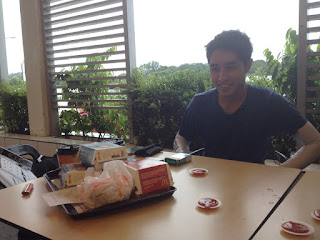
Yi Yang still smiling under the heat

Tortured Pirelli Diablo Supercorsa rear

Obliterated Michellin Pilot Pure rear

A little gift from the gravel trap

Edwin had the unfortunate accident of dropping his bike. He entered the last turn with too much entry speed and went into the gravel trap. Just when he was about to come to a complete stop, the front tyre hit a medium sized rock and caused him to lose his front. Some minor scratches to the right of his CB400 and cracks in the headlight assembly. He escaped unhurt, just a bruised ego and some holes in his pocket haha.

Crashed out at last turn and back for repairs

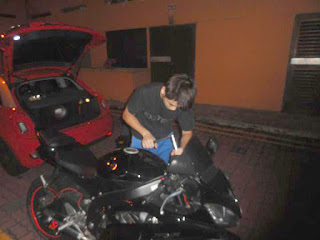
Edwin working hard at being a mechanic

We rested for awhile and then Eric and I went out to buy lunch from McDonald's for everyone. Not exactly a healthy breakfast and lunch but it was the most convenient!

Rafie, Yi Yang and I rested a little and went again for the 1.30pm session! Rafie went again despite both soles of his ancient boots coming off. Patch it up with masking tape and he was good to go. Crazy bugger.

Temporary solution to old riding boots for an aggressive rider

Rafie knows how to take a break

This time, Yi Yang crashed at turn 6. He entered the turn a little to fast and grabbed a handful of brakes. According to a rider who was following behind him, his rear tyre was chattering as he entered the gravel trap, causing him to drop the bike. Windshield broke and some minor scratches on his right fairing. He walked away unhurt. Another bruised ego and hole in pockets heh.

CBR600RR crashed out with broken Zero Gravity double bubble screen

Minor fairing scratches

Rafie posted the best lap time of 2m 11s amongst the riders. Pretty damn good for a first timer. The rest of us averaged around 2m 16s.

Nonetheless, the important thing is that we had fun and everyone was unhurt. Next trip is to a Go Kart circuit in Plentong! In the meanwhile, I'm looking to buy some stuff, maybe a new helmet or some accessories. Till then, ride safe!

Friday 18 May 2012

Review: Muc-Off Foam Fresh & Fog City Hyper Optiks Visor Insert

I dropped by Motoworld 2 days ago with Eric. I went there with intentions of looking for a paddock stand but ended up buying some helmet accessories. Typical me, always ending up buying something unplanned for.

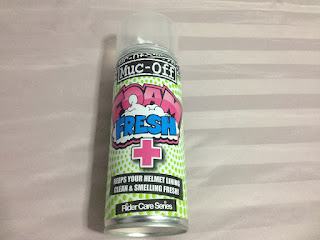
The first item I bought was this Muc-Off Foam Fresh, foam cleaner for helmet linings.

Muc-Off Foam Fresh

Bought this for SGD$13. The instructions guide say to take out your helmet linings first, remove dirt and mud from them, then apply the foam cleaner. But seriously, who has mud in their helmet linings? I know I don't. So I just wiped the linings with some tissue paper and then applied the foam cleaner. It has a citric smell and it produces a fizzling sound as it seeps into your helmet lining. As per the instructions, I wiped off the excess foam and put the helmet linings back into the helmet. Do note that the helmet linings end up being a little wet. I used a hair-dryer to dry it a little before putting the helmet on. And viola! The product works great, no more foul smelling helmet. You have to apply a lot of the foam cleaner for it to work though, see the video below for what I mean by a lot.


The next item I bought was the Fog City Hyper Optiks Visor Insert.

Fog City Hyper Optiks Visor Insert

It is essentially a light reactive, UV blocking, anti-fog film. The insert is big enough to cover your field of vision, yet small enough to fit onto virtually any visor. Oh, and the cool thing about it is that it turns from a standard light mint green tint to a cobalt blue tint in seconds under bright light. This kind of obsoletes tinted visors. Now, I can ride in the day and not be bothered with sun glare, yet still be able to ride at night with clear vision through my visor. I also tested the insert in rain, and it's perfect! No fog at all under heavy rain. The package comes with clear instructions and provides you with the necessary items to aid you in aligning the insert to your visor. Bought it for SGD$40.

The last item I bought was a set of ear plugs for SGD$2, heh.

Motorcycle ear plugs

Cheap and good. Ear plugs reduces rider fatigue, which is particularly useful for touring or track days.

That's all I have for this post. Will be heading to the track with my friends really soon. Until then, ride safe!

Thursday 17 May 2012

Broken R6 Mirror

A few days ago, I had the most unfortunate experience of breaking my R6's left mirror. No, I did not crash into anything. I broke my mirror, while parked, with my left hand. How did that happen? Beats me haha. I did my usual routine of folding in the mirrors after I parked the bike. I make it a habit to always fold my mirrors in when parked, you never know if the bugger who parked beside you just knocks the mirror and rides off.

These should be all the parts of the R6's mirror, or at least all that I could find on the ground.

Broken Yamaha R6 2011 mirror

The small round solid piece at the top right of the photo is the one that broke away from the mirror. The piece on the bottom right is the one that is attached to the bike's head cowl. The washers are supposed to be stacked between the bottom right piece and that round piece. In this order from top to bottom, mirror, bottom right piece, washers, round piece. Sadly, there is no way to fix it back, unless you have some super strong glue but then you would lose its folding feature.

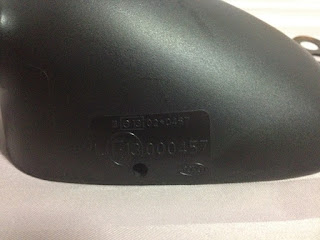
I rode to HKL the same day and got it replaced. Was there at 9.30am and it arrived at 12.30pm. Got the original Yamaha R6 left mirror for SGD$95, ouch! I know it's the original because it has the same part number as my right mirror.

Yamaha R6 2011 mirror part number

Still pretty expensive for a mirror. Word of advice, the next time you are folding in your bike's mirror, use 1 hand to support the base of the mirror and the other hand to fold it. Don't yank it like I did. That's all for this post. Cheers and ride safe!
Monday 7 May 2012

Trip to Desaru

Just had one of the best Sundays of my life yesterday. Got chased by a thunderstorm, enjoyed the Desaru Golden Beach breeze and watched the Malaysian Bike Race Series.

I started off the day by meeting the rest of the convoy, Eric, Edwin, Rafie and Yi Yang at Rafie’s place. Edwin was the first to arrive even though he stayed the furthest away, such is Singaporean punctuality. By 8:45am, everyone has arrived. We took a photo and left for the Tuas Second Link. Nothing spectacular during this point of the trip, except during our usual ‘blast’ down the Second Link bridge, Edwin’s CB400 was coughing out carbon. Eric’s A1 was right behind him and he commented, “When I saw the cloud of black smoke, I let go of my accelerator”.

Because bikes and cars go through different toll gates and customs gates, our 4 bikes had to reunite with Eric’s car somehow. We decided beforehand to have breakfast before going about our journey. Lady luck was smiling on us. There was a rest-stop with food stalls and Petronas just after the tollgate. We had our breakfast, can’t remember who had what but there was Lontong and Nasi Lemak. Edwin and Yi Yang were so starved, they decided to take a few bites out of their plastic forks as well.

Desaru 2012

Having satisfied our growling tummies, we went to the Petronas station and pumped our machines with the best fuel they had. RON 97… Not the best you can find but oh well, we didn’t want to search for another petrol kiosk.

And off we go! First stop was to go to the Johor Circuit at Pasir Gudang to enquire about the Bike Race Series (BRS) which was taking place from 9am to 5pm. Led by Eric’s A1 with GPS turned on, we blasted down the Malaysian highway with great haste. But our joy was short-lived. Soon, we were stuck in traffic at 80km/h once we got on the Pasir Gudang highway. Combine the slow speed and the ridiculous amount of potholes, it was fast becoming an uncomfortable ride. Even Eric and Edwin complained on their A1 and CB400. Kidding right? At least they were not hunched over in a missionary position.

After about 40 minutes of “Ugh”, “Ouch” and “Ack my back hurts”, we finally arrived at the Johor Circuit entrance. It was 15rm per person to watch the full day race event. Pretty damn worth the money. It was 11.30am and we told the gate keepers we would be back after we came back from Desaru haha.

Off we went, led by the A1 again to the newly built Senai-Desaru expressway.  Boy, I was giggling inside my helmet when I saw the expressway. Long never-ending straights with wide lanes. Eric took the cue and floored the pedal. The bikers followed suit, full throttle in full tuck postures. The sight must have been pretty amazing for bystanders, if there were any. An Audi A1, followed by a Honda CB400, a Yamaha R6, a Suzuki GSXR600 and a Honda CBR600RR blasting down the expressway at speeds exceeding 200km/h. What a rush!

Once I saw the Senai-Desaru bridge, I knew we had to stop for a photo moment. I did the incorrect way of getting Eric's attention though, high-beaming and horning him from behind haha. Boys and girls, the correct way is to accelerate to the front of the pack and signal the convoy leader to stop.

The convoy posing in front of the Sungai Johor Bridge on the Senai-Desaru Expressway

Right after that photo, the thunderstorm which  I forgot to mention until now, caught up to us. It was following us ever since we left Johor Circuit. We grabbed our gear and blasted down the bridge. The view was...

One word. Breathtaking. 

Wasn’t long until we reached our destination, I’m guessing we spent about 30 minutes figuring out where to park. Fearing that our bikes would be stolen, we abandoned Eric’s A1 and rode into the beach. Well, almost.

The bikes at Desaru beach

Parking coupon for Desaru beach car park

We sat around to catch a breath and some smokes. 40 minutes later, the thunderstorm caught up with us again. It was about 1pm and I made the worst decision that I could have made in the entire trip, which was to head back to Pasir Gudang with the storm bearing down on us. 10 minutes on the way back, and the rain was so heavy I could barely see 10 metres ahead of me. But still, we persevered, shivering in our wet underwears.

The rain became lighter as we got onto Pasir Gudang highway but the pothole to tarmac ratio increased, not to mention their sizes also increased.  I was riding behind Edwin and I officially declare him the Pothole Master. He rode through at least 4 potholes, one of which caused his GIVI rack’s baseplate to fly off. I saw something fly off after he engaged that pothole, so I quickly sped up, rode beside him and checked his bike. I swear it looked perfectly fine and I didn’t notice anything amiss. Only until we stopped at Mcdonald’s then he realized his baseplate was missing haha.

The rain made us really cold and very hungry. The big “M” sign post was the most comforting sight, kudos to Edwin for spotting that. Maybe that was why he never saw those potholes, because he was busy looking for food haha. The Mcdonald's was just 1 minute away from Johor Circuit, perfect stop for our lunch. Eric, who was all comfortable and dry, took orders for us. Thanks Eric.

Happy Rafie with McDonald's

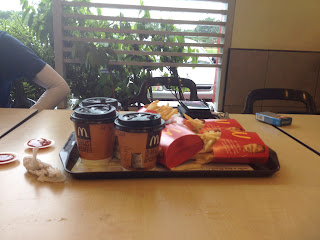
Our McDonald's lunch

Oh and did I mention that the Mcdonald’s was conveniently located beside a Petronas and a Shell station. We promptly filled up after lunch and headed to Johor Circuit. It was 3.30pm and we had 1.5 hours of races left! No words can describe the sights and sounds that we experienced.

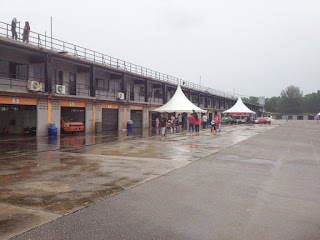
Johor Circuit pits, Pasir Gudang

Johor Circuit pits, Pasir Gudang

The 1000cc Superbikes were the finale race event and we were there to watch it!  We left Johor Circuit feeling very satisfied heh. After that, it was a quick stop at Second Link KFC for dinner before we headed back to Singapore. Despite the race and brutally bumpy roads, that Sunday became one of the best days of my life. Next trip should be to Johor Circuit in our leather suits for some fun. 

More updates soon. Ride safe!

Friday 4 May 2012

Aftermarket Exhaust Inspection

I just returned from the STA inspection centre at Boon Lay Way. Passed my inspection with flying colours haha. This is my first time getting an aftermarket exhaust inspected.

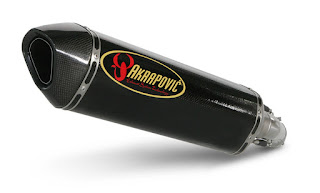
Akrapovic aftermarket LTA exhaust inspection

In Singapore, owners of vehicles with an aftermarket exhaust, upon request, are required to produce a certificate stating that their vehicle has passed inspection. To acquire this certificate, one needs to bring their vehicle to an authorized inspection centre.

Today, I took half day leave and went to Bukit Batok Vicom from my workplace. Turned out that their computer system was down, and they were not able to do any motorcycle inspections for the day. One of the inspection officers suggested that I go to Boon Lay Way's STA instead.

It was just a short journey there, about 20 minutes perhaps. Before all this, I did some research and understood that such inspections are called VITAS, which stands for Vehicle Inspection and Type Approval System. This is different from the regular annual inspection that registered Singapore vehicles over 2 years of age are subjected to. You will need to prepare the following documents before going to the inspection centre:

Vehicle Log Card
Obtain from www.onemotoring.com.sg. Go to LTA eServices (login) >> Check your particulars and assets

Certificate of the exhaust system
Obtain from your exhaust distributor or the shop you bought the exhaust from. This is useless without the inspection centre's stamp on it. With the stamp, it becomes the official certificate authorizing the ownership of your exhaust system.

Installation procedures
This is to show that the exhaust was installed properly on your bike. It can be obtained from the shop you bought the exhaust system from. Mine was the standard installation guide which can be obtained from the Akrapovic website.

Document stating who installed the exhaust system
This is a generic document that you can write using any word processing program with the shop's stamp on it. The document should state the shop which installed your exhaust system, your name, your NRIC and your vehicle number. If you installed it yourself, I read somewhere that you have to get a shop to endorse it somehow.

Purchase receipt of the exhaust system
Just a regular receipt stating that you bought the exhaust system through legal means. If you bought it from an individual, there should be some proof stating that. Perhaps a written document and a photocopy of the seller's NRIC.

Upon reaching the inspection centre, ask around where you can do VITAS inspection. There will be an inspection officer who does this, he/she will be the one who checks your documents, tests your bike and issues you the certificate.

When the initial document processing was done for me, we went outside and the inspection officer took photos of my bike and the exhaust system. Every single nut and bolt was scrutinized. He took about 20 photos in all. Maybe he was a bad photographer, I don't know haha.

When the photo taking was done, the inspection officer asked me to ride my bike into the inspection lane where he revved my throttle in short bursts, up till about 4-5k rpm. The computer recorded 89db or so. My Akrapovic slip-on can definitely exceed that if it went into redline, I supposed any vehicle would fail if they were all revved into redline heh. Next, he put a tube into my exhaust to check the emissions rating. Not surprising that my emissions rating was lower than the 2-stroke RXZ that went before me.

After that, I followed him back into the office where he stamped my certificate and gave me a letter stating my vehicle and exhaust details. Both documents complement each other, only if both documents are produced, then it is considered that you're authorized to have the exhaust system installed on your bike. Total cost was SGD$78.

Feel free to post any questions in the comments. Good day and ride safe!

Tuesday 1 May 2012

Basic Suspension Setup

Just did initial suspension settings for my R6 myself last night, with the help of Eric and Edwin. 2 new additions to our little group. Eric drives an Audi A1 and Edwin rides a Honda CB400 Spec 1. Eric's A1 and Edwin's CB400 are very much welcomed additions to the group. It is definitely better to travel in a bike convoy with at least some sort of safety car. Edwin's CB400 has a big mounted GIVI rear box, useful for quick response with tool kits or first aid heh. Our convoy of 4 bikes and 1 car will be setting off for Desaru this Sunday. More about that in another post.

This post is about basic suspension setup! Previously, I had my suspension settings done at HKL, it was pretty good but I wanted to learn how to do it myself. Spending SGD$40 every time for minor adjustments is not exactly friendly to my bank account.

There are some basics you need to know before proceeding. You need to know what the following terms mean and how they can affect your bike's handling.

Preload
It means exactly what the name says, this adds load to your front forks or rear shocks without you on the bike. More preload means there is more load on the springs, therefore the springs are pre-compressed more. This makes the springs stiffer. Less preload reduces load on the springs and relaxes the springs. The key objective from adjusting preload is to set your sag.

Sag
Let me use an example for this. To measure my front sag, I hold on to my clip-ons and lift up the front of the bike. Then I get a friend to measure the length of the exposed inner silver part of the forks. Next, I sit on the bike in a full tuck position, with both feet off the ground and a friend supporting the front of the bike so it doesn't fall over. Now I measure the same part of the forks again. The difference between these 2 measurements is my front sag.

To measure the rear sag, you do the same thing. First by lifting up the rear of the bike, rear tyre off the ground then measuring the distance from the rear axle to the tail of the bike. It doesn't matter where exactly, I usually just mark a spot on the the tail of the bike and use the same reference for both measurements. Measure the distance for both with and without you on the bike, the difference of these measurements is your rear sag.

A ballpark gauge for street riding is 35-45mm for front sag and 30-35mm for rear sag. For track, it would be 30-35mm for front sag and 25-30mm for rear sag.

Rebound Damping
This adjusts the speed at which your front forks or rear shocks return to their original position after compressing, meaning after hitting a bump. A stiff rebound setting makes the springs return to the top of the stroke slower But take note, if it does not return to the top fast enough and you hit another bump when it is returning to the top, your suspension compresses again. As you hit more bumps, your suspension will eventually bottom out, not a good feeling. Too little damping does the reverse, your suspension tops out, not good either. A good initial setting is to have the spring return to the top of the stroke in 1 second.

Compression Damping
This setting adjusts the speed at which your springs dive. Increasing compression makes the front forks or rear shocks stiffer and slows down the dive. Decreasing compression does the opposite.

My R6 comes with adjusters for high and low speed compression. High speed compression affects sudden bumps, which are short and fast strokes, whereas low speed compression affects slow strokes, like gradual hard braking.

Now that you're equipped with some basic knowledge about suspensions, I can show you what I did last night. Here are some photos. That's Edwin in the white shirt and me squatting down with Eric's A1 in the background.

Yamaha R6 2011 suspension setup

Adjusting front preload with a size 12 wrench.

Yamaha R6 2011 suspension setup

I was actually writing a post on how I set my suspension settings but I figured reading is too confusing and difficult to grasp. Instead, I shall share with you some videos which were helpful in my learning process. Take a look at the following videos, they should give you a better idea of where the settings are on an 2009 Yamaha R6 and how to adjust them.

2009 Yamaha R6 Front Forks Settings


2009 Yamaha R6 Rear Shock Settings


Here are some references for suspension settings on my 2011 Yamaha R6. Take note I weigh 75kg and all adjustments are from full stiff settings. If I write 15 clicks, it means 15 clicks anti-clockwise.

Stock Settings
Front Sag: Did not measure
Front Preload: 2
Front Rebound: 20 clicks
Front Hi Speed Compression: 2 turns
Front Lo Speed Compression: 15 clicks
Rear Sag: Did not measure
Rear Preload: 4
Rear Rebound: 16 clicks
Rear Hi Speed Compression: 3 turns
Rear Lo Speed Compression:16 clicks

The stock settings were pretty okay for me, quite comfortable for an off-the-shelve setting.

Settings by HKL
Front Sag: Did not ask
Front Preload: 2
Front Rebound: 10 clicks
Front Hi Speed Compression: 3 turns
Front Lo Speed Compression: 17 clicks
Rear Sag: Did not ask
Rear Preload: 4
Rear Rebound: 7 clicks
Rear Hi Speed Compression: 3 turns
Rear Lo Speed Compression: 9 clicks

This was actually a good setting but the front forks would suddenly dive when the bike comes to a stop under braking.

Current Settings
Front Sag: 35mm
Front Preload: 1
Front Rebound: 14 clicks
Front Hi Speed Compression: 2 turns
Front Lo Speed Compression: 14 clicks
Rear Sag: 30mm
Rear Preload: 2
Rear Rebound: 12 clicks
Rear Hi Speed Compression: 3 turns
Rear Lo Speed Compression: 15 clicks

Still trying out this current settings, it feels like the bike is a lot more eager to turn. My next step would be to continue refining the settings until I feel that it's perfect.

Suspension setup is a heavy topic and it takes time to get the perfect setup for your riding style and physical attributes. Have patience.

That is all I have for now, will update you guys after my trip to Desaru this Sunday. Ride safe!