Sunday 17 June 2012

Review: Arai RX-7 RR5

Finally heeded the voices in my head and took a trip to Chiap Lee yesterday. Chiap Lee is the local distributor for Arai helmets. They have 2 showrooms, 590 Serangoon Road and 109 Jalan Besar. I went to the Jalan Besar showroom and found that that they have relocated. Well, they just moved across the road, to be beside Regina now. So, scratch that, it's not 109 Jalan Besar as stated on their website, it should be 159 Jalan Besar.

It was about 11am when I got there. I spent about 5 minutes in Regina first, looking at the AGV GP-Tech Elements helmet.

Was quoted  SGD$880 for it. Personally, I like Rossi's helmet designs; very complicated and loud. So why didn't I get the AGV GP-Tech? I did some research online and discovered that, like my AGV K3, the GP-Tech's neckroll cannot be removed for washing. Trust me, after some mileage on helmets, that thing is gonna stink. The neckroll is the piece of lining that wraps around your neck, it's the first of the the helmet's lining that your head touches when you put on the helmet.

And there is this issue with AGV helmets at full tuck. During a full tuck posture, when you're peering through the top of the visor, a ridge at the top of the helmet's opening blocks the top half of your vision, which is extremely annoying and dangerous if you're a track amateur.

Okay, enough about the GP-Tech. I was about to cross the road to the old Chiap Lee showroom when I saw that they have moved over to the slot just beside Regina. Perfect! Walked in and went to the Arai helmets section, looking at all the available RX-7 RR5 designs. The Arai RX-7 RR5 is the same exact helmet as the European RX-7 GP and the North American Corsair V, just different marketing for the different regions.

I did my homework before this and measure my head's diameter. It's 57cm and that translates to a size M. There were only 2 staff in the shop, a middle aged man and a middle aged woman who I presumed was his wife. I vaguely remember the man's name to be something like Ying Leong, somewhere along the initials YL. The man attended to me and brought me a size M helmet for fitting. God, like all the online reviews say, it is pretty difficult to put on an Arai helmet. The neckroll is really tight but once you put on the helmet, it fits like a glove. Very comfortable and snug. I asked to try on a size L. It was easier to put on the larger helmet but it wasn't as comfortable. I recommend that you measure your head diameter before buying any helmets.

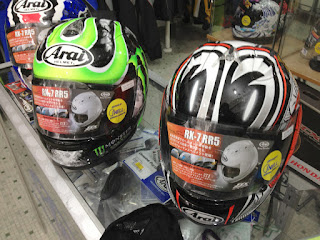
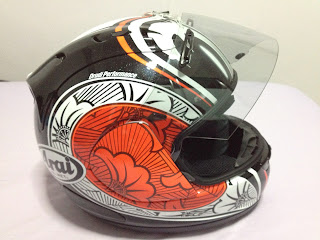
So it was down to choice of designs. I was stuck between choosing the Cal Crutchlow and the Nakano Sakura design.

Arai RX-7 RR5 Cal Crutchlow and Nakano Sakura

The helmet retails for SGD$980 but because the Cal Crutchlow design uses the copyrighted Monster Energy logo, it costs an additional SGD$50, making it SGD$1030. To help me with my decision, I employed the help of Rafie and Eric through our Whatsapp chat group. To summarize, the Crutchlow design looks better but the Nakano design complements my bike and track suit. On top of that, Rafie already owns a HJC RPS-10 Ben Spies Monster helmet, I figured that our riding group has only enough space for 1 Monster Energy helmet haha. Which means, I bought the Arai RX-7 RR5 Nakano Sakura heh.

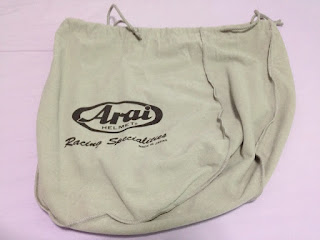
After I made my decision, the man called the Serangoon branch to bring over a brand new helmet. I was pretty excited when the dispatch rider delivered the Arai box. Inside the box, other than the helmet, you get an Arai helmet bag, some user manuals and an Arai sticker. The user manuals aren't too useful, because they are printed in Japanese but the detailed step-by-step instructional pictures should be sufficient.

Manuals and stickers that came with the Arai RX-7 RR5

Arai helmet bag that came along with the helmet

I rode home with the new helmet and I discovered something very pleasing. The RX-7 RR5 is very quiet and the ventilation is top-notch. With all the vents opened, I could actually feel cool air circulating around my head. With great money, comes great products!

Here are some more photos of the helmet.

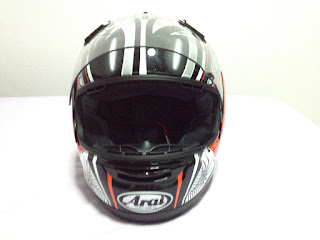
Arai RX-7 RR5 front view

Arai RX-7 RR5 side view

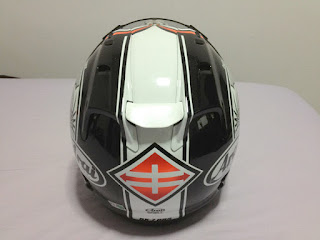
Arai RX-7 RR5 rear view

Arai RX-7 RR5 another side view

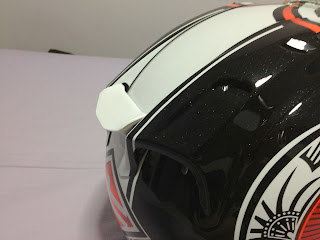
Allow me to show you something really cool. The Arai RX-7 RR5 has an adjustable spoiler at the back of the helmet! You would want it to be down when you're at full tuck and all the way up (4 clicks) when you doing straight up riding like on a super motard. I leave mine at 2 clicks up. The spoiler is supposed to help put down force onto your head, preventing your head from being dragged around by wind resistance.

Here's the spoiler at the highest position.

Arai RX-7 RR5 spoiler for straight-up riding position

And at the lowest position.

Arai RX-7 RR5 spoiler for full tuck riding position

Overall, I am very satisfied with this purchase. There are more features of the helmet that I have not described in my review. Do see the video review by Revzilla below.


Next task would be to see how the RX-7 RR5 performs on a race track. Till then, ride safe!

Sunday 10 June 2012

Permas Go-kart Club

Yesterday was the day I abandoned my love for 2 wheels and hopped onto a 4-wheeled vehicle for some adrenaline pumping fun! Go-karting in Malaysia! I woke up at 8am for a quick shower and some preparation before Eric drove his A1 and picked me up at 8.30am. We went to his office and exchanged the A1 for the Audi Q5. The A1 looks like a toy beside the massive Q5, but it's naturally our weapon of choice for our trip to the Permas Go-kart Club. Bumpy plantation roads leading to the circuit definitely calls for a SUV!

By the time we got to Rafie's place, everyone was already there. Rafie, Edwin and Yi Yang climbed on the back of the SUV and off we go, in search of our 4-wheeled track session. Clearing the Singapore Customs at Tuas was a breeze, until we saw the queue at the Malaysian Customs. That was a bitch. We were stuck in the jam for more than an hour, all the while bitching about how it would have been faster if we went on our bikes. But then, our bikes are not fitted with GPS and do not have shelter from the weather. So we changed subjects and went on to talk about how Rafie made a profit from the Vespa he sold. 1 hour stuck in the traffic jam is easy to endure if you have good company like this.

After about 40 minutes of driving, we arrived at our destination. Well not exactly. You see, the GPS only brought us to the vicinity but we had to find the entrance into the circuit and none of us knew how to get there haha. We searched around for 10 minutes and decided to screw it. Hungry men could never get anything done, we found a nice cosy place for breakfast. It was about 11am when Eric's and my Roti Prata arrived at our table, the rest ordered Maggi Goreng. When it was time to pay for our meals, Rafie asked the lady how to get to the circuit with his 'excellent' command of the Malay language. The lady told us to go straight then turn left, sounded easy enough.

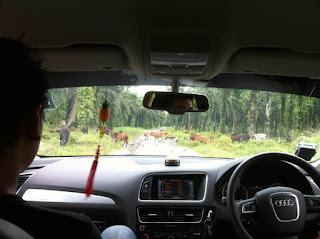
We hopped onto the SUV and set off. 10 minutes later, we concluded that we were lost again haha. Eric was busy checking the map on his phone while Edwin and I got off to ask the cashier of a convenience store. He told us to go back to Permas Bridge and ask the staff at the Shell station. Got back into the car and Eric still had no luck, so we took the cashier's advice. We backtracked to where we came from and did not see any bridge or any Shell station. I think it was Yi Yang who saved the day, he spotted a small brown and white sign that read 'Permas Go-kart Circuit'. As we continued further down the road, we hit a T-junction and saw another sign that directed us to turn right. We were back to the street where we had our food and guess what, the entrance to the circuit was just opposite the place we ate. Either the lady was trolling us or Rafie misunderstood her haha. We followed the signs and finally reached the pits. Mind your driving on the plantation road though, there are a lot of potholes and cows. Yes, big fat cows along the road. Even in our SUV, I think we rarely exceeded 50km/h.

Each session lasts 10 minutes, which equates to about 10 laps on the circuit. For 35rm, you get to drive the 160cc go-kart or if you're feeling daring, you can opt to pay 55rm for the 390cc go-kart. Trust me, unless you're hitting lap times of below 1m 5s, there is no need to opt for the bigger capacity go-kart. There was already a Singaporean group of 5 guys there. We joined them for our first session. After the session, the older one of the group made a remark, "Play 1 time where got enough, I think I play at least 5 times ah!". He was right, go-karting is addictive. The kick comes from trying to counter-steer to control the go-kart in a slide after accelerating off the apex of a turn. The go-karts have no suspensions and there is no power steering. You experience the full brunt of G-forces and vibrations as you struggle to use your aching arms to steer the go-kart around a turn. Every successful turn is very satisfying!

Eric only played 2 sessions while the rest of us went for our third and last session. Good because we finally had someone to take photos haha. Taken with an iPhone 4 and a Samsung S2. Enjoy the (grainy) photos!

The circuit's security guard.

The guard dog

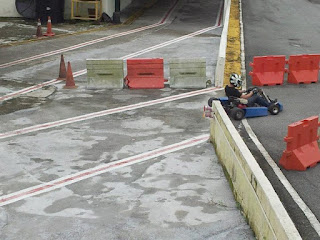
Exiting the pit.

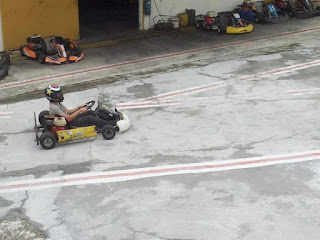
Me exiting the pits

Rafie exiting the pits

Yi Yang exiting the pits

Race!

Permas Go-Kart Club track turn 9

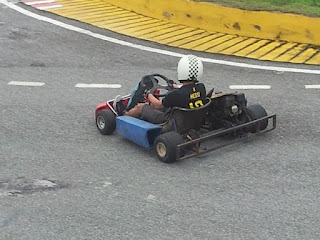
Yi Yang negotiating turn 9

Exiting turn 8

Entering turn 10

Rafie at turn 9

Starting grid

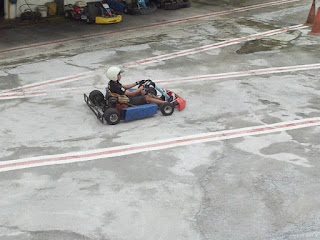
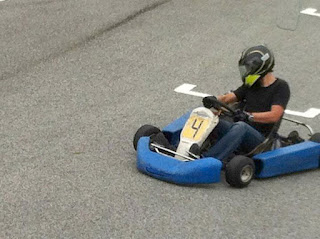
Drifting from turn 10 exit

Yi Yang entering turn 1

Me exiting turn 9

Yi Yang entering turn 9

Me entering turn 1

Rafie entering turn 1

Me about to enter turn 1

Yi Yang fell in the love with the greenery at the side haha.

Yi Yang crashed out

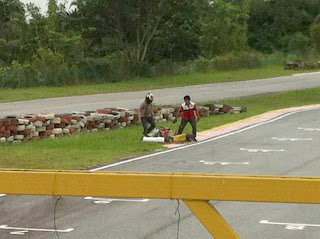
Getting back on his kart

After that session, we headed for the Tuas Checkpoint. These are the cows I warned you about. We had to stop and wait for them to finish crossing the road.

Cows! Lots of cows!

Waiting for the cows' permission to pass

We made a stop at the Second Link KFC for some food and drinks. Pumped the Q5 up to a full tank and went back home. Oh, and this is what greeted the Singapore Customs officer when he asked Eric to open up the boot. I swear his eyes dilated when he saw that haha.

Our helmets

That's all for this post. I'm currently looking at the Arai Corsair V Cal Crutchlow Replica, maybe my next post will be on my new helmet purchase heh. But for now, ride safe!

Monday 4 June 2012

Review: TechSpec Gripster Tank Grips: Snake Skin

I have been wanting to buy the TechSpec Gripster for my bike for the longest time and I finally found the time last Saturday to go to JR Singapore to get my hands on them. JR Singapore is the local distributor for TechSpec Gripster products.

I reached the place at around 10.30am, parked my bike at the open car park just 50 metres away and walked over. No surprise that I was their first customer haha. The rack of TechSpec goodies are right at the back of the shop. Every TechSpec packaging has a printed sticker on them indicating the bike that they are for, I looked high and low but did not find the sticker that reads 'Yamaha R6'! I panicked and started feeling a little depressed! Then when I was about to give up and go home upset, I realized that there were more TechSpec products at the back of the rack. Fail much? I was relieved and at the same time annoyed at my stupidity haha.

TechSpec Gripster tank grips come in 3 different designs, C3, High Fusion and Snake Skin. The Snake Skin is their premium product so I naturally chose it. Go to their official site for more information. The side tank grips for the R6 08-11 is priced at SGD$81. Bought them and rode home as fast as I could, couldn't wait to put them on my bike haha. The R6 side tank grips come in 2 pieces for each side.

TechSpec Gripster Tank Grips: Snake Skin

There isn't really a need to use masking tape, markers or whatever to help you align the grips to the bike. They are pre-cut accurately to the shape of your bike, you just have to follow the edges of your tank and press them onto your bike! Piece of cake!

Took me about 20 minutes to apply all 4 pieces to my bike and I must say they look fantastic.

TechSpec Gripster Tank Grips: Snake Skin on 2011 Yamaha R6

I actually made a mistake of putting the left lower grip on the right side of the bike and vice versa. The photo above was taken after I corrected the mistake. TechSpec actually states that you can peel off the tank grip and re-apply a total of 8 times. Well, I did it once and it still works perfectly. 2 thumbs up for this product!

Rode to work today and the grip was amazing. My knees no longer slide up and down the tank and it really gives the 'locked in' feeling. With my knees gripping onto the tank almost effortlessly, I can focus on other important aspects of riding, like looking out for idiotic drivers. I recommend this product to everyone who rides, this would have been my first bike product if I knew it was this good!

That's all for this review, ride safe!