Sunday 30 September 2012

Guide to Zero Crashes

Simple, don't ride! I'm kidding, there's no such thing. I want to debunk the myth where some veteran riders boast how safe they ride and the fact that they have never crashed. They haven't crashed; yet. No matter how safe you ride, how slow you go; one day, you will be lying on the road (hopefully still breathing), thinking what the hell just happened.

Sure, you can ride defensively and stick to traffic rules. But that doesn't stop the idiot in a truck behind you from running you over. I've had a couple of crashes in my 8 years of riding with a mileage of about 100,000 km. Some were silly, like going at 5km/h in a car park and falling because of an oil patch. Others are worst, changing lanes without checking my blind-spot and hitting the truck beside me.

But there are pros to crashing, despite all the cons. For example, you will never know the limits of your brakes until one day you brake so hard, your rear wheel lifts up and spits you off. At the track, you will never know how much abuse your tyres can take during a bend, until you eventually low-side off to the gravel trap. 

There are so many things you can learn from crashing, so why is everyone afraid? Well for most people, I would suppose it's the cost of repairs, that's unavoidable unless you make enough to buy a new bike every week. Amazingly, all the riders I know are not bothered by physical harm, they care more for their bike than their missing appendages.

The key is not to ride so safe you become paranoid; it's to prepare for that eventual spill. Dress for the crash. With proper gear, a lot of pain and agony can be prevented. Heck, you can even protect your bike from crashes; add crash-guards. This video shows a CBR600RR with crash-guards.


It doesn't look pretty but it is heck a lot better to scratch the crash-guard than your beautiful plastics. The poor guy left his side-stand down from 2:22 mins and well, it didn't turn out great for him.

So what kind of gear should you be wearing? If you stay in a cold country, full leather suits, always. It may sound extreme but in the event of a crash, you are going to be glad you made that choice. However, in hot and miserable Singapore, perhaps an armoured jacket and armoured jeans. A full-face helmet with proper leather gloves are a must in all weather conditions. I skip the armoured jacket because I would probably dehydrate before I reach my destination, but that's my own personal choice. You may argue that you will never crash if you ride safely so it's okay to wear shorts, slippers and a SGD$20 open-face helmet. But hey, it's your choice that you're willing to lose some toes or have your chin rubbed off on tarmac.

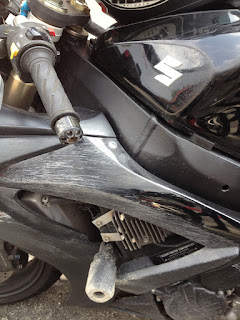
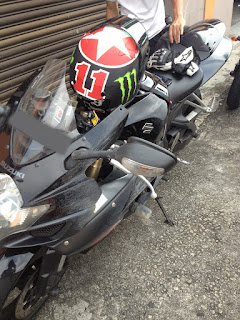
Today, we went for a track day at Johor Circuit and Rafie discovered the correct entry speed for turn 1. Unfortunately, he paid for the discovery.

Rafie's crash at turn 1

Scratched fairings

Broken Zero Gravity screen

Every crash helps you learn something you didn't know or understand before. Granted, it was an expensive lesson but he definitely understood his own limits and the limits of that particular corner.

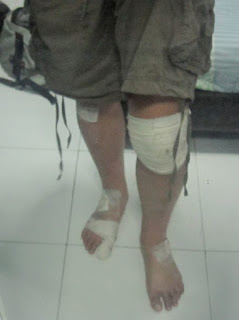
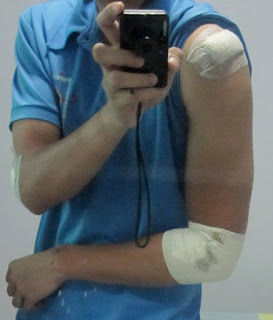
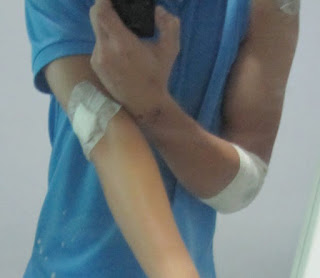
These photos are from my accident with a truck about 2 years back. No broken bones, thank god. I was wearing shorts and slippers which I still regret up till today.

This is why you don't ride in shorts and slippers

No jacket? Add road rash to upper body

More road rash

Healing

I hope I have scared you enough to run out now and buy proper riding gear.

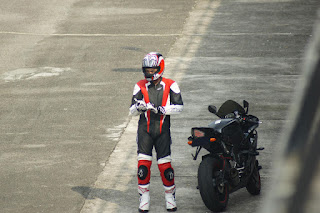
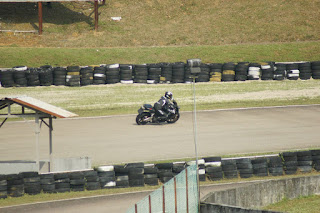
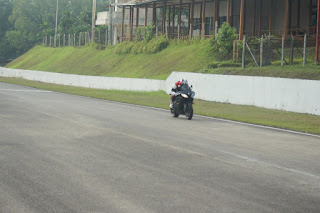
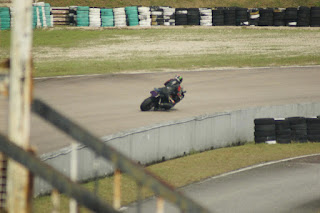
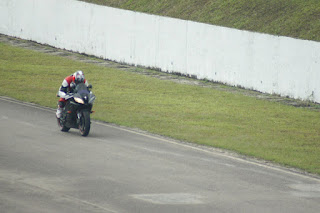
Here are some photos from today's track day as a bonus.

Getting ready for a few more laps

Packed track day

Motorcycle Stig?

Planning my next strategy

Almost full tuck down the front straight

Corner entry

Entering...

Still entering...

Either the camera was too fast or I was too slow

There! Entered!

Other track goers at turn 1

Yi Yang taking it easy

Me down the front straight again

Rafie in a rather awkward posture

Awkward posture but knee down? Wow.

Other riders

Rafie blasting down the front straight

Me at the front straight again

Overtaking at the back straight

That's all I have for this entry. Ride safe!

Sunday 23 September 2012

Wash Your Bike

I can't stress how important it is to wash your motorcycle regularly. Not only does it keep it looking spanking new, it also helps you to detect early warning signs of wear and tear. Not to mention, nobody likes to look at or sit on dirty bikes; nobody. There goes your chances of not dying a virgin.

If you ride your bike daily, I would recommend washing it at least once every weekend. You will be able to wash away the grime and dirt that it has accumulated over the week. On top of that, you can perform your own DIY maintenance, like lubing your chain.

First of all, I stay at an apartment, so I don't have my own garage and water hose. Here are the tools and products I use for a bike wash.

The tools and equipment

From left to right:
1. 2 pails, 1 for washing foam and 1 for clean water
2. Bottom section of a mineral water bottle, for splashing your bike with water
3. WD40, for lubing your key insertion points, and wiping dirt off your rims and sprockets
4. Autoglym Bodywork Shampoo Conditioner
5. Autoglym Aqua-Dry Chamois Synthetic Leather
6. PJ1 Blue Label Chain Lube
7. 2 washing mitts, 1 for bodywork and 1 for rims
8. 1 bag of cloths and sponges, for swapping out if any of the mitts become too dirty

You probably can't tell how much dirt there is on my bike, but trust it, it is dirty.

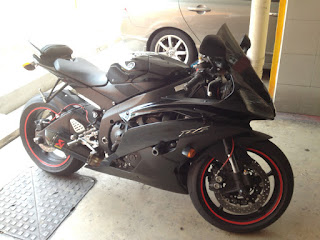
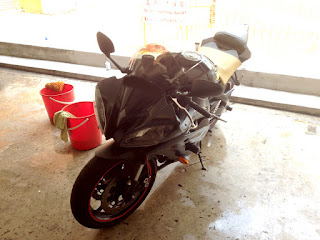
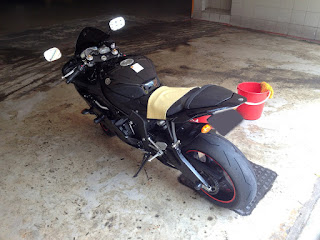
My dirty 2011 Yamaha R6

Start by removing parts that you don't want to get wet. For me, I remove these:
1. Front and rear brake reservoir socks
2. Headlight protectors
3. Rider seat
4. Passenger seat

Remove the seats

Start by pouring a good amount of the washing shampoo into the pail. As a gauge, I make sure the bottom of the pail is covered with the shampoo before I start adding in water. Fill about half the pail with water, you don't need that much for the shampoo. Then fill the other pail with clean water.

If you have a hose, then use it to hose down the bike of dirt and dust. Use a softer setting for the water jet, you don't want it to damage any parts or scratch your paintwork. If you're like me and don't have a water hose, use a container like my mineral bottle to pour all over your bike. Be careful not to pour directly onto any electrical stuff like the battery.

Wash away dirt and dust

The reason I use a water container and not a sponge to wet the bike is because you might leave scratch marks on your paintwork if it gets caught with hard particles. After that's done, it's time for the tedious part. I use one of the washing mitts for the plastics, and the other for dirty areas like the rims and sprockets.

Slowly clean from section to section. I like to start from the fuel tank, to the right fairing, left fairing, head cowl, tail, then exhaust. If you're not lazy like me, wash away the shampoo with clean water after shampooing those mentioned parts. Either by hosing it down with a water hose or a sponge. I wouldn't use the water container here because you might miss some areas. But I'm lazy haha, so I continue with my other washing mitt to wash the rims, sprockets, chain guard, and rear hugger.

I spend about 30-45 minutes for this entire process. Also use the time to inspect your bike. Who knows, you might find a missing nut or bolt. Or the worse, you find a new scratch. Oh well, it adds character to your bike haha.

The end result should look something like this.

Shampoo time!

Time to water the shampoo away. This time round, it's okay to use the sponge since you've washed away the dirt and grime. Make sure to wash all the shampoo away with clean water. If you miss any spots, it's going to leave a white spot later when it dries. Don't do that.

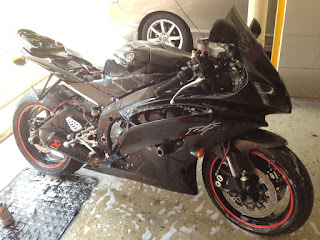
Water away the foam

After this, I reassemble all the parts that I took out prior to washing. The chamois cloth now comes into play. I highly recommend you to buy one. Dampen the chamois cloth and rinse it as dry as your biceps allow, then wipe it over the wet areas of the bike. You will notice that there will still be water spots on the bike but they will be tiny and spread out, those water spots will evaporate perfectly and not leave water stains on your bike.

When I washed my bike this time, there were really stubborn (and sticky) stains on my rims and sprockets. So I used a random cloth and wet it with some WD40, then wipe away the stains. WD40 is a degreaser, so it makes your job fairly easy over those gooey parts. Be careful not to get any on your plastics though.

Time to lube the chain and WD40 all your key insertion points. Namely your ignition, fuel tank cap and passenger seat. Then viola, job done!

Wipe dry with chamois cloth

Looking good

Job well done

Remember to start your engine and rev it a few times to blow out water that might have went into your exhaust.

That's all for today. Ride safe!

Monday 10 September 2012

Flying R6 Side Tank Cowl

I must be the luckiest R6 rider on Earth. A couple of days ago, my right side tank cowl decided to break up with my fuel tank. I guess it was because I now favour right-handed corners more and therefore more contact with the left side cowl.

So what happened? I was riding home one day after meeting the missus and her friends. It was the day after I returned from the Malacca trip. I was waiting at a traffic light junction, when the lights turned green, I accelerated normally and I felt something brush against my right thigh. I looked down and checked a few things. Wallet, check. Mirror, check. Signal light, check. So what the heck brushed my leg? It was still the hungry ghost month of the Chinese lunar calendar so I switched to think about other things, like puppies and kittens. Got home safely and did not think about it.

The next day, I rode to work and did not notice anything amiss. On the way home the same day, I finally noticed that the grip of my right thigh on the fuel tank did not feel the same, so I peered down and inspected. Lo and behold, at 110km/h in peak hour traffic, I realized that my right side tank cowl was missing. F***.

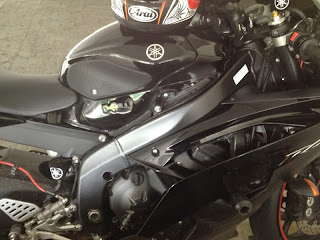
I took this photo as soon as I got home.

Where the heck is my side tank cowl?

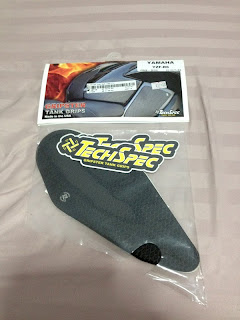
I didn't know what was worst. The fact that it flew away or that my TechSpec grip also flew away with it. It was a Friday evening and I called HKL straight away to order a set of the side tank cowls. Yes, a set. Just in case the left one decides to fly away too.

Saturday. Checked with HKL again and they confirmed that the stock will arrive at 1pm.

Firstly, I had to go to JR to buy a new set of TechSpec grips for SGD$81 for which I will only use 1 piece. Second, to HKL to get my side cowls. The trip to JR was quick one. I arrived at HKL around 12pm to meet up with Rafie who was doing major servicing on his GSXR600.

As promised, the new side cowls came at 1pm and during the installation of the new side cowl, I realized that the left one has cracked. F***. Just my luck, guess I was right to order both side cowls.

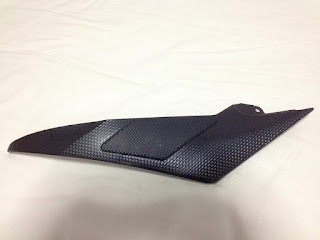
Here's the cracked piece. Zoom in on the TechSpec grip, the crack is somewhere there.

Cracked left side tank cowl

One of the HKL staff said that the R6 side tank cowl is one of their best sellers. Highly fragile, and susceptible to wear and tear. The side cowls cost SGD$35 a piece. I went home and surfed forums around the world to find out more about this. The HKL staff was right, the piece is indeed fragile, some riders actually suggest to buy Velcro tape to secure them. I suppose I will try that.

For the time being, if anyone is interested in buying the fuel tank portion of the TechSpec grip, please let me know.

TechSpec Gripster Tank Grips: Snake Skin for sale

Know what sucks? My brand new 3-week old rear tire got punctured by a metal wire last week. Wtf man. Did an internal patch for SGD$60. Riding a bike is not cheap at all. Pfft.

I just created a Facebook page for this site, join the page and let me know what you would like to read about. www.facebook.com/RidingBible

Ride safe!